
Walk into any pottery supplier's website as a beginner and you will be offered a sixty-piece tool set in a zip-up case. Most of it will sit in a drawer untouched for a year. Meanwhile, the four or five things you use every single session cost about as much as a takeaway.
The trick is knowing which is which. What follows is what genuinely earns its place on a beginner's bench, what can wait until you know how you like to work, and where to save money without buying rubbish.
The genuine essentials
These tools do the work whether you throw, coil or build with slabs. Buy them singly rather than in a set — you will get better quality for the same money.
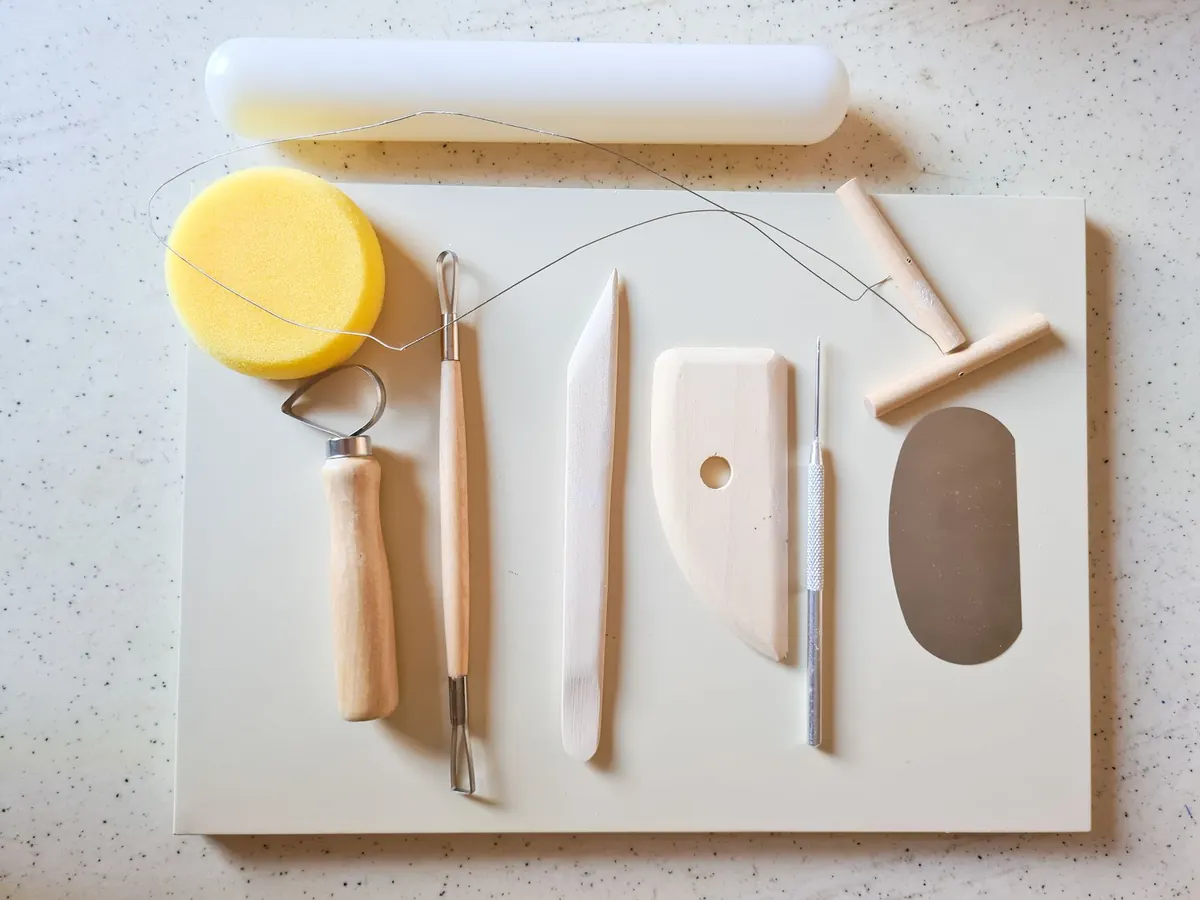
- A cutting wire. For slicing clay off the block and levelling the top of a bag. A length of fishing line tied between two dowels works perfectly if you would rather not buy one.
- A potter's needle. Marks, tests, tidying rims, pricking air bubbles. A large darning needle pushed into a cork does the same job.
- Three or four wooden modelling tools. One flat, one rounded, one pointed. These shape, smooth and refine everything you make.
- Two ribs. A flexible rubber or plastic rib for smoothing and compressing, and a rigid wooden or metal one for scraping and shaping.
- Sponges. At least two weights: a fine one for finishing and a coarse one for mopping up. A cheap car sponge cut into quarters will last months.
- A bowl and a bucket. Clean water on the bench, slops in the bucket. Never the other way round.
- Ware boards. Flat, rigid boards for carrying and drying work. Offcuts of MDF or melamine shelving are ideal; a warped board will ruin a rim.
- An apron and a dust mask. Unglamorous, entirely necessary.
One thing matters more than any tool on that list: clay dust. Dry clay contains silica, and the fine dust is the real health risk in a pottery, not the wet clay on your hands. Clean up with a wet sponge rather than a brush or a dry cloth, never sweep, and wear a mask when you handle dry clay, mix a casting slip or sand a fired piece. If you have an existing lung condition, speak to your GP before setting up a workspace at home.
Extras for throwing on the wheel
If you are learning to throw, four more things make the difference between fighting the clay and enjoying it.
- A throwing sponge. Small and fine, kept for the wheel only.
- Loop and ribbon trimming tools. For turning the foot of a leather-hard pot. A single wooden-handled loop tool is enough to start.
- Calipers. The quickest way to make a lid fit or to repeat a mug size. A cheap plastic pair is fine.
- A chamois leather or rubber kidney. For tidying rims and burnishing a leather-hard surface.
You will also need access to a wheel and a kiln. Most people start at a community studio or an evening class, which is usually cheaper and far more instructive than buying equipment for a spare room.
Extras for hand-building
Coil and slab work need very little. A rolling pin — the kitchen one will do until you buy a proper one — plus two straight wooden guides of equal thickness to roll slabs evenly, and a knife such as a fettling knife or an old table knife, cover most jobs.
Add a scoring tool for joining. A fork, a hacksaw blade or an old comb all work; the important part is to score both surfaces, wet them with slip and press the join firmly. Keep a small jar of slip and a cheap brush beside you, and cover work with a plastic sheet — a cut-up shower curtain or a bin liner — so it dries slowly and evenly. A simple turntable, such as a cake decorating stand, is a genuinely useful stand-in for a banding wheel.
Nice-to-haves you can happily postpone
Texture rollers, stamps, extruders, throwing sticks, a Giffin Grip, a slab roller, a pug mill, a full set of twenty ribs: all lovely, none required. Also on this list is your own kiln. Firing takes space and commitment, and until you know what you enjoy making, pay-per-fire arrangements at a studio or a local pottery group are far more sensible.
Buying secondhand is worth considering for rigid tools — a banding wheel, calipers or a set of ribs rarely wear out. Be more careful with anything electrical, and avoid glazes of unknown origin, since you cannot know what is in them or how they have been stored.
Budget options and substitutions
You can build a working kit for very little if you are happy to improvise. A few substitutions that hold up:
- A bank card or old credit card as a flexible rib — snip the corners to make curves.
- Fishing line or garden wire for a cutting wire.
- A darning needle in a cork for a potter's needle.
- Chopsticks, lolly sticks and cocktail sticks for modelling and detailing.
- A cake turntable for a banding wheel.
- MDF offcuts from a timber merchant for ware boards.
- Kitchen scales for weighing clay so your mugs come out the same size.
Where not to economise: clay, firing, and anything that keeps dust down. Inconsistent clay makes learning harder, and a studio that does not wet-clean is a false saving. Sponges and ribs you can replace freely; your lungs you cannot.
Start with less, add as you go
Buy the essentials list, spend two or three months making things, then notice what you keep reaching for. That is the tool you buy next. Potters accumulate kit slowly and deliberately, and the best-equipped benches are rarely the ones that started with a sixty-piece set.
If a tool has not left the drawer in six months, it was never essential — and you probably knew that when you bought it.
Photo: Kerimenur Doğan / Pexels